Page 1 of 2 12 LastLast
Results 1 to 10 of 12

Thread: 99 Camaro MTX wideband install + pics (large)

  1. #1
    Senior Member
    Join Date
    Apr 2010
    Posts
    167

    Default 99 Camaro MTX wideband install + pics (large)

    OK all, said I'd do a mini 'write up' if you can call it that, or rather just a run through of what I've done to install the MTX wideband.

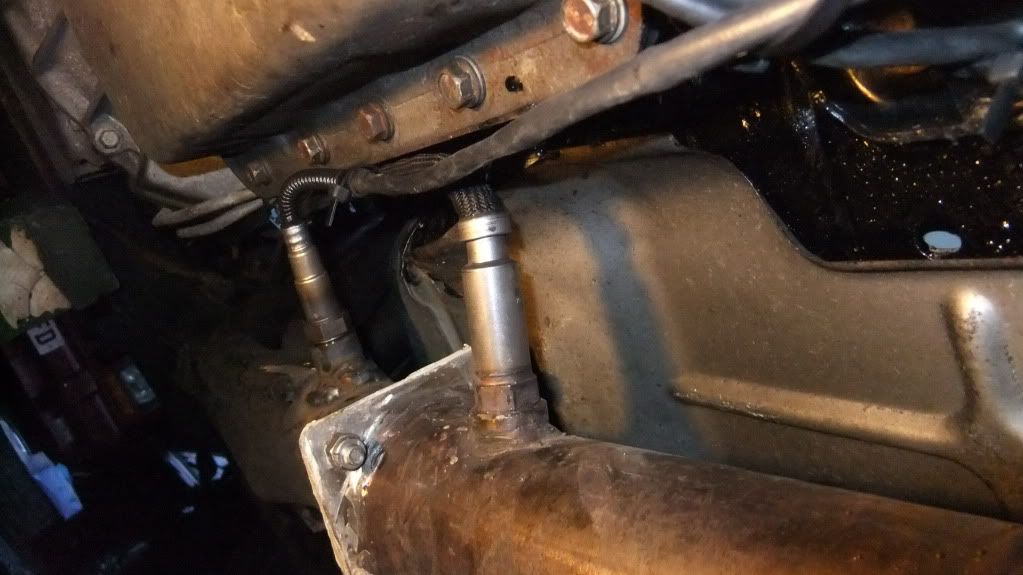
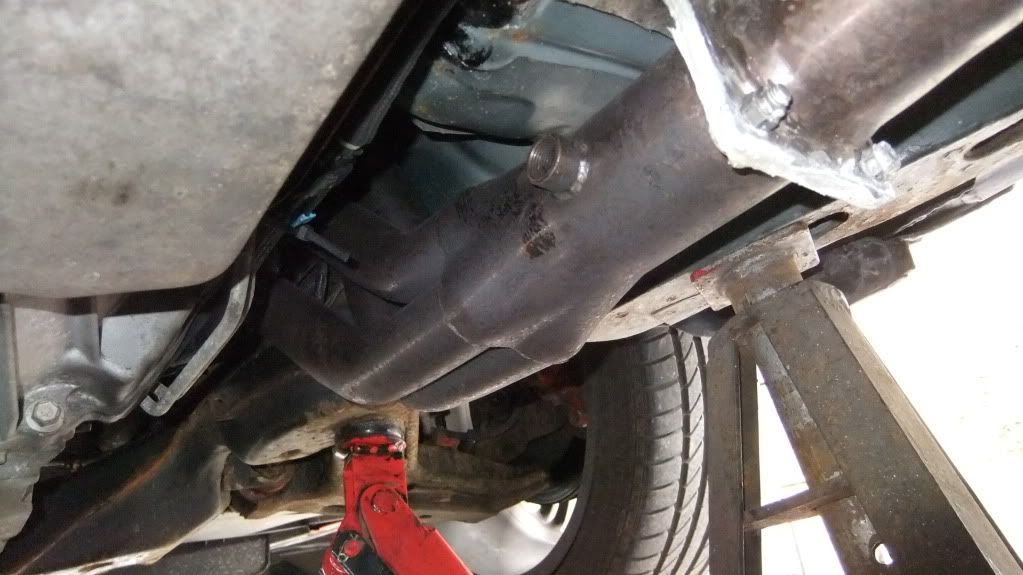
    First things first, get the car up nice and high to get to the exhaust headers


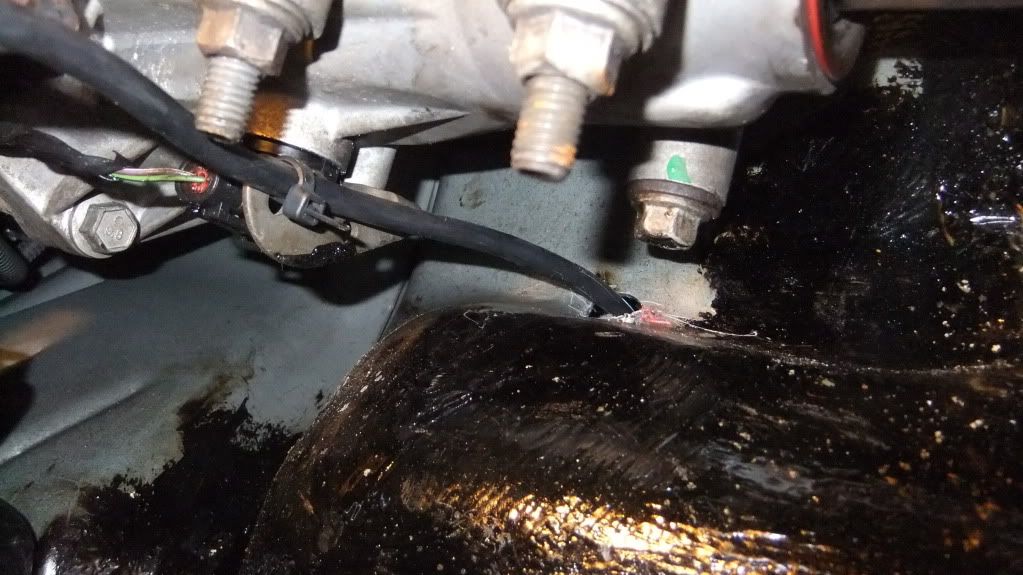
    Now i'm using the front bung as came with the headers, I'd already installed one a little farther back to put the NB O2 in preparation. However the bung on the headers for some magical reason had a little larger thread, so had to cut it and weld the supplied one on!!


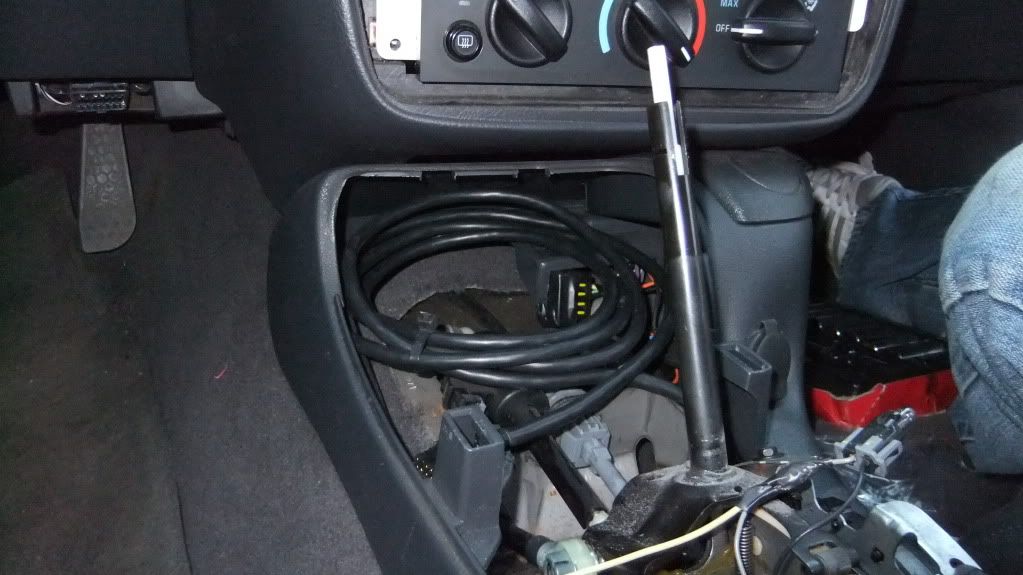
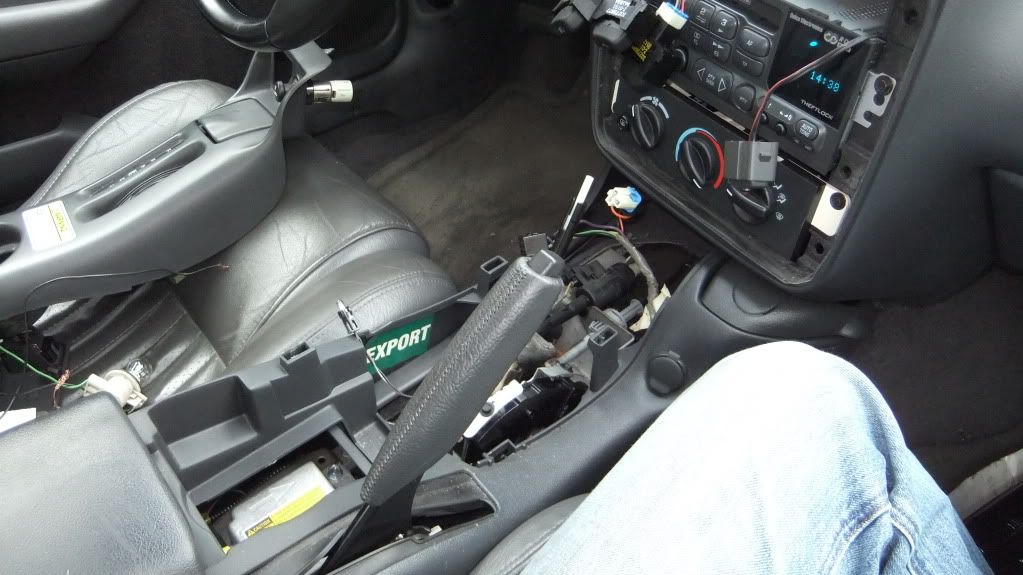
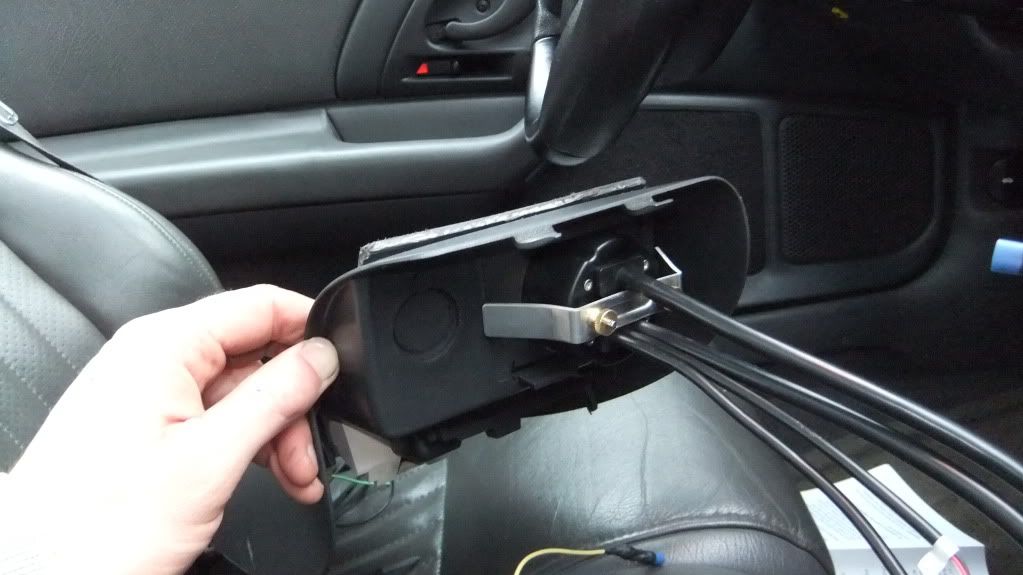
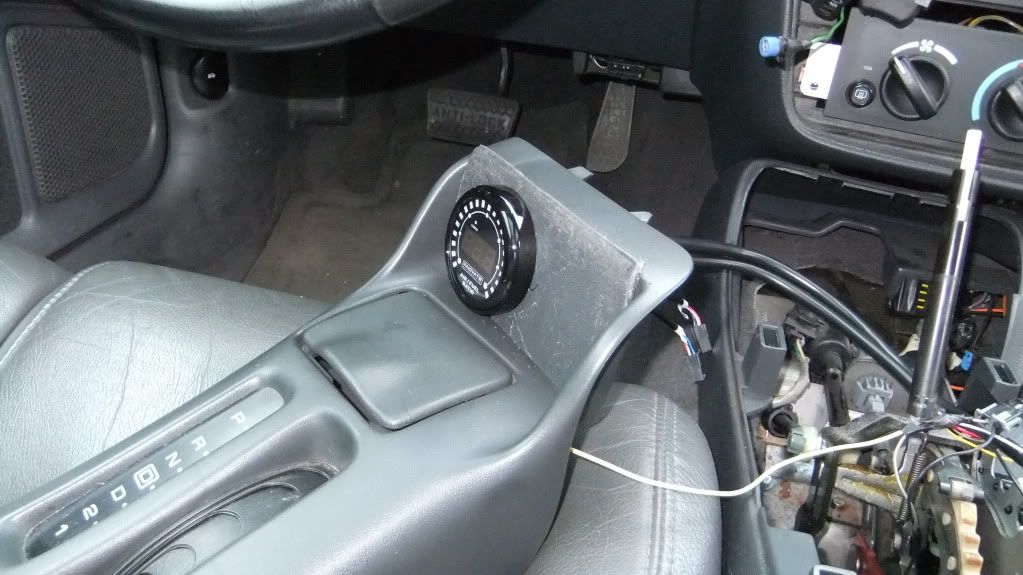
    So next to the inside. I wanted the gauge below the radio. This meant pulling up all the interior centre console. TO GET A4 KNOB OFF THERE IS A CLIP AT FRONT JUST PULL IT OUT. All the bolt/screws were either philips heads or 7-8mm and 10mm (from memory) but can be undone if you have basic socket set. Put in keys and get the car into neutral (DONT SWITCH THE CAR ON) and lift the console up and out while changing gears so you can get the whole thing off


    Next I needed to source some wires for the gauge.
    Got the ignition positive from the ASR switch (so pulled my vents and swiches to get in. Needed to extend MTX +ve wire to reach under the radio.
    Was using the mount for the centre console which screwed to the chassis as the Earth.
    Used the positive from the gear selector light under the centre console for the 'dimming feature' - MTX dims when you have light on, not as harsh to look at then


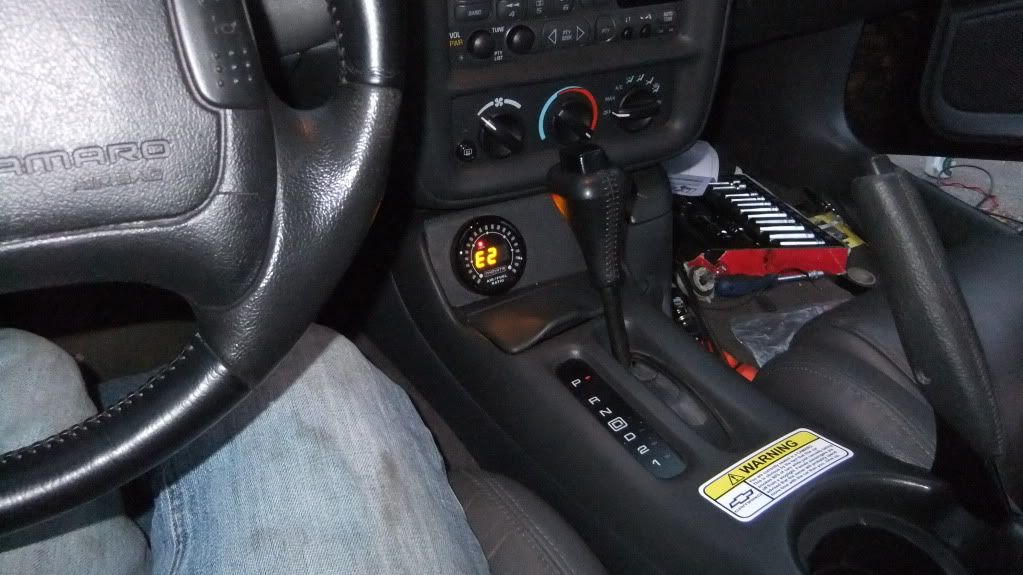
    Before hard wiring the gauge in I cut a hole in some plasic that matched the interior (from other car's t-top holders that usually are in trunk/boot) And cut the hole and fitted the gauge through. I also removed the cigerette lighter, that was a nightmare, had to bend the inside 'cage' and allow plasic piece the slot out


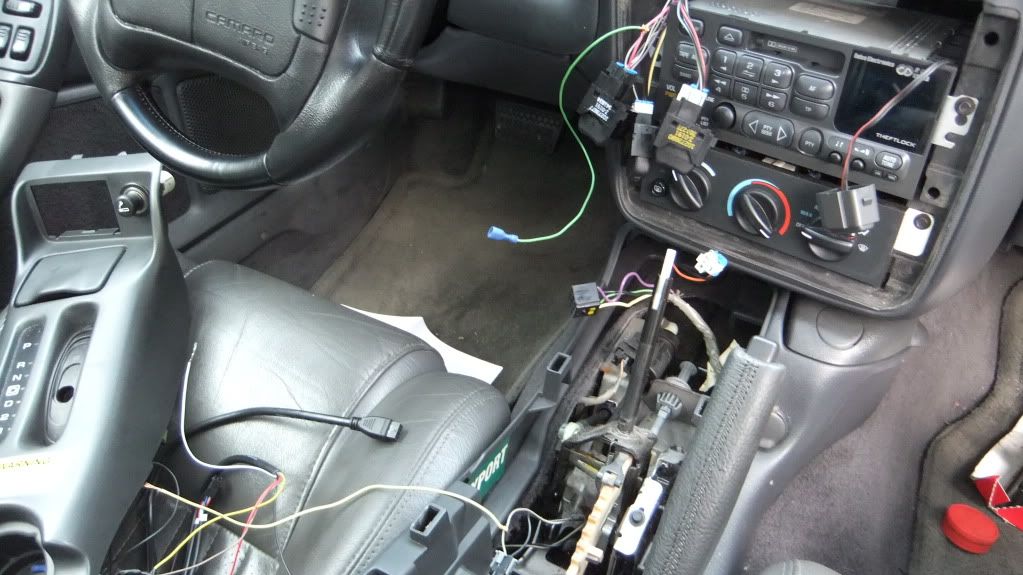
    Now I hard wired everything in with soldering iron. I taped up the analog outputs as i'm using an LM2 cable from TAQ (many thanks it's awesome - plug and play)
    Check the wiring by turning the ignition on. Should get E2 code -->> sensor not connected

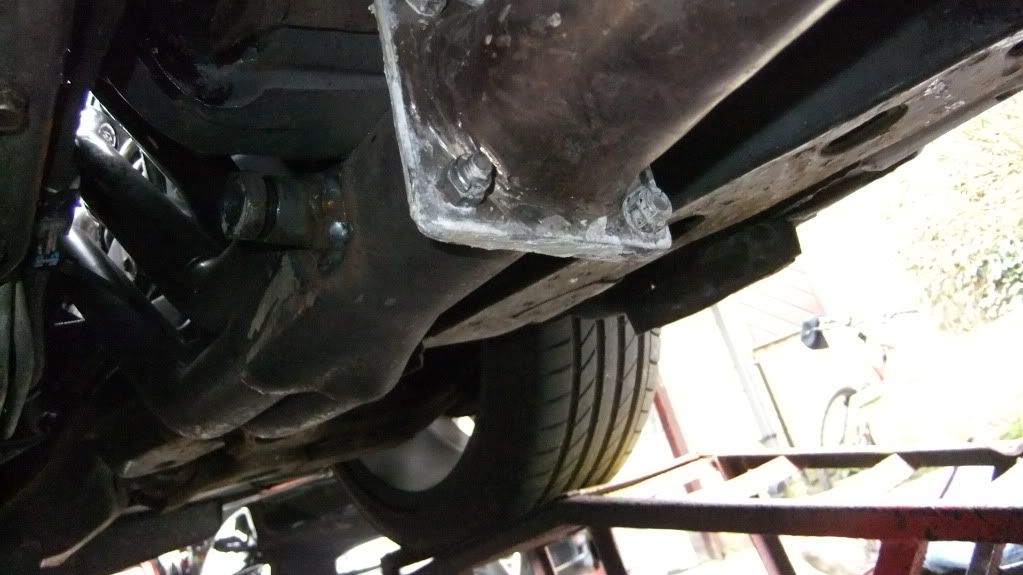
    Next got under and figured out where the WB would go and the cable. I wanted the cable plug to rest on the trans mount on top so it doesn't get really wet from the road, also found a good spot to drill the floor.

    Back in the car I pulled the passanger side carpet back from the centre console area and drilled a hole (no pic :( but it is about at the front of the handbrake area, before the cup holder that pulls out from under the radio.

    Then feed with wire through carefully. I cable tied/wrapped it into place and used a poly urethane body sealer to seal the hole.


    Back up top I fed the wire in a nice loop as it's sooooooooo.... long and plugged into the MTX. Then put he centre console back in, being very gentle as the gauge and wires had limited room. I also kept the serial out pulled down so it is accessable under the radio area.

  2. #2
    Senior Member
    Join Date
    Apr 2010
    Posts
    167

    Default


    So all is connected bar the sensor.

    So now do the free air cal. Turn on the WB and get the E2 code.
    Leave it for 30 sec or more so it goes into cal mode.
    Turn ignition off, and plug in wide band (still in free air NOT THE EXHAUST PIPE)
    Turn ignition on, and the WB will heat up and calibrate.
    When done it will display 22.4 AFR
    Turn off ignition and unplug the sensor to get it into the bung and then reconnect and tire wires up. DONT TURN IGNITION ON WITH SENSOR UNPLUGGED AS THIS RESETS TO DO FREE AIR CAL AGAIN


    Tie up all wires and we're done

    Hopefully this is a bit informative and shows its a relatively easy job as long as you can weld the bung in on the exhaust

    MaudyZ28

  3. #3
    Joe (Moderator) joecar's Avatar
    Join Date
    Apr 2003
    Posts
    28,403

    Default

    Thanks for the pix.

  4. #4
    Joe (Moderator) joecar's Avatar
    Join Date
    Apr 2003
    Posts
    28,403

    Default

    What's the warning label on your console, did the car come like that...?

    What's the black/brown stuff on your floorpan behind the trans...?

  5. #5
    Senior Member
    Join Date
    Apr 2010
    Posts
    167

    Default

    Quote Originally Posted by joecar View Post
    What's the warning label on your console, did the car come like that...?

    What's the black/brown stuff on your floorpan behind the trans...?
    Comedy sticker
    http://cgi.ebay.com.au/Chev-CAMARO-W...item335b7f8e71

    The black stuff is a bitumin underseal all over floor pan, all nice and black and sealed, keeps it from rusting in UK

    Some bits are not done just aove tras but dont get water up there anyways and cant get in with a brush

  6. #6
    Joe (Moderator) joecar's Avatar
    Join Date
    Apr 2003
    Posts
    28,403

    Default

    Ah, I see, that's funny (and true).

    Ah, underseal, yes keep rust away.

  7. #7
    Lifetime Member
    Join Date
    May 2010
    Posts
    507

    Default

    Nice job maudy, really appreciate the pics and writeup. I just installed my mtxl also. It seems like a pretty accurate sensor. Much better than the outdated and well used aem I was using previously. It is much quicker reacting also. Do you find that it takes a little to long for the sensor to warmup and start reporting? On a cold start I felt it was a little slow, and I missed some crucial first startup changes in afr because it was not heated yet. By the time it started reporting afr I had already dropped 8-10 kpa on my map sensor reading. Thanks Keith
    1997 S10, 06 trailblazer SS LS2 swap, 4L70E trans, 76mm turbo. Factory ZQ8 suspension. 3.08, G80 w/a zexel. With a 0411 swap.

  8. #8
    Senior Member
    Join Date
    Apr 2010
    Posts
    167

    Default

    it does take a while to warm up as you say, you could leave ignition on and warm it before starting but it says NOT to do this in manual incase any moisture hits the preheated sensor?? idk if you'd risk doing that for checking early AFR

  9. #9
    Senior Member
    Join Date
    Mar 2009
    Posts
    101

    Default

    That looks good. I was curious about that gauge. You said you use the lm2 taq cable. I have a lm2 with taq cable, and I wamt a wideband I can mount permenant on car and still log serial with. I thought the mtx had only analog outputs.

  10. #10
    Senior Member
    Join Date
    Apr 2010
    Posts
    167

    Default

    yeah I wanted one in permanent as I'm running OLSD and just wanted to keep an eye on things. I read up about the gauge and it does have serial in and outs. But just had to check pins. TAQ was really helpful and confirmed that it is same as LM2 cable and sent me one. Then just plug and play, all AFR match perfectly.

    Think upon reading about the gauge the MTX uses the LM2 software and such but is designed for use in one specific vehicle rather than the multiplicity of using the LM2 itself

Page 1 of 2 12 LastLast

Similar Threads

  1. innovate MTX wideband
    By maudyZ28 in forum Gen III V8 Specific
    Replies: 30
    Last Post: June 21st, 2011, 02:02 PM
  2. Installed MTX wideband - first thoughts
    By maudyZ28 in forum Gen III V8 Specific
    Replies: 2
    Last Post: March 29th, 2011, 01:01 PM
  3. FJO wideband install
    By sinr98 in forum Gen III V8 Specific
    Replies: 3
    Last Post: April 27th, 2010, 04:15 AM
  4. Which side to install wideband on
    By Gregs in forum General (Petrol, Gas, Ethanol)
    Replies: 8
    Last Post: April 12th, 2010, 07:06 AM
  5. Getting ready to install my wideband...
    By Loudmouth LS1 in forum General (Petrol, Gas, Ethanol)
    Replies: 2
    Last Post: January 6th, 2007, 04:21 PM

Posting Permissions

  • You may not post new threads
  • You may not post replies
  • You may not post attachments
  • You may not edit your posts
  •